Not Your Mama’s Chaturanga: How Yoga’s Approach to this Fundamental Posture Has Changed
Like many postures, the consensus about how to do Chaturanga (and how frequently) has evolved over the past several decades. Many yogis began to rethink their relationship to this pose after years of practice left them with shoulder injuries. The solution most have found is to do fewer Chaturangas with greater attention to alignment.
Not so very long ago, Chaturanga was commonly taught with somewhat contradictory alignment cues. We were instructed to push back through our heels with our feet flexed and at the same time keep our elbows stacked over our wrists at a 90-degree angle after lowering into the full posture. But for most bodies, these two alignment points don’t play well together.
When we push back through our heels, our elbows will naturally be positioned behind our wrists. It makes more sense anatomically to come forward on the toes in our preparatory Planks, which moves the shoulders in front of the wrists (see below). As you lower, your elbows will then naturally stack over your wrists, a position of stability and power. This can take some getting used to, but it is key to healthier shoulder joints over the long haul. And, in many bodies, it just feels better.
If you can’t maintain a straight line from the crown of your head to your heels during a controlled lowering of the body to hover above the floor, then you’re probably not strong enough for full Chaturanga just yet. Try releasing your knees to the mat before you lower to build strength and become comfortable with the optimal alignment. If you get tired during a session and your form starts to suffer, either switch to doing the pose with the knees down or skip it altogether. Doing all the Chaturangas doesn’t win you a prize.
Benefits:
- Builds strength in the arms, core, and back
- Improves body alignment awareness
Instructions:
- Begin in a Plank position with the shoulders over your wrists.
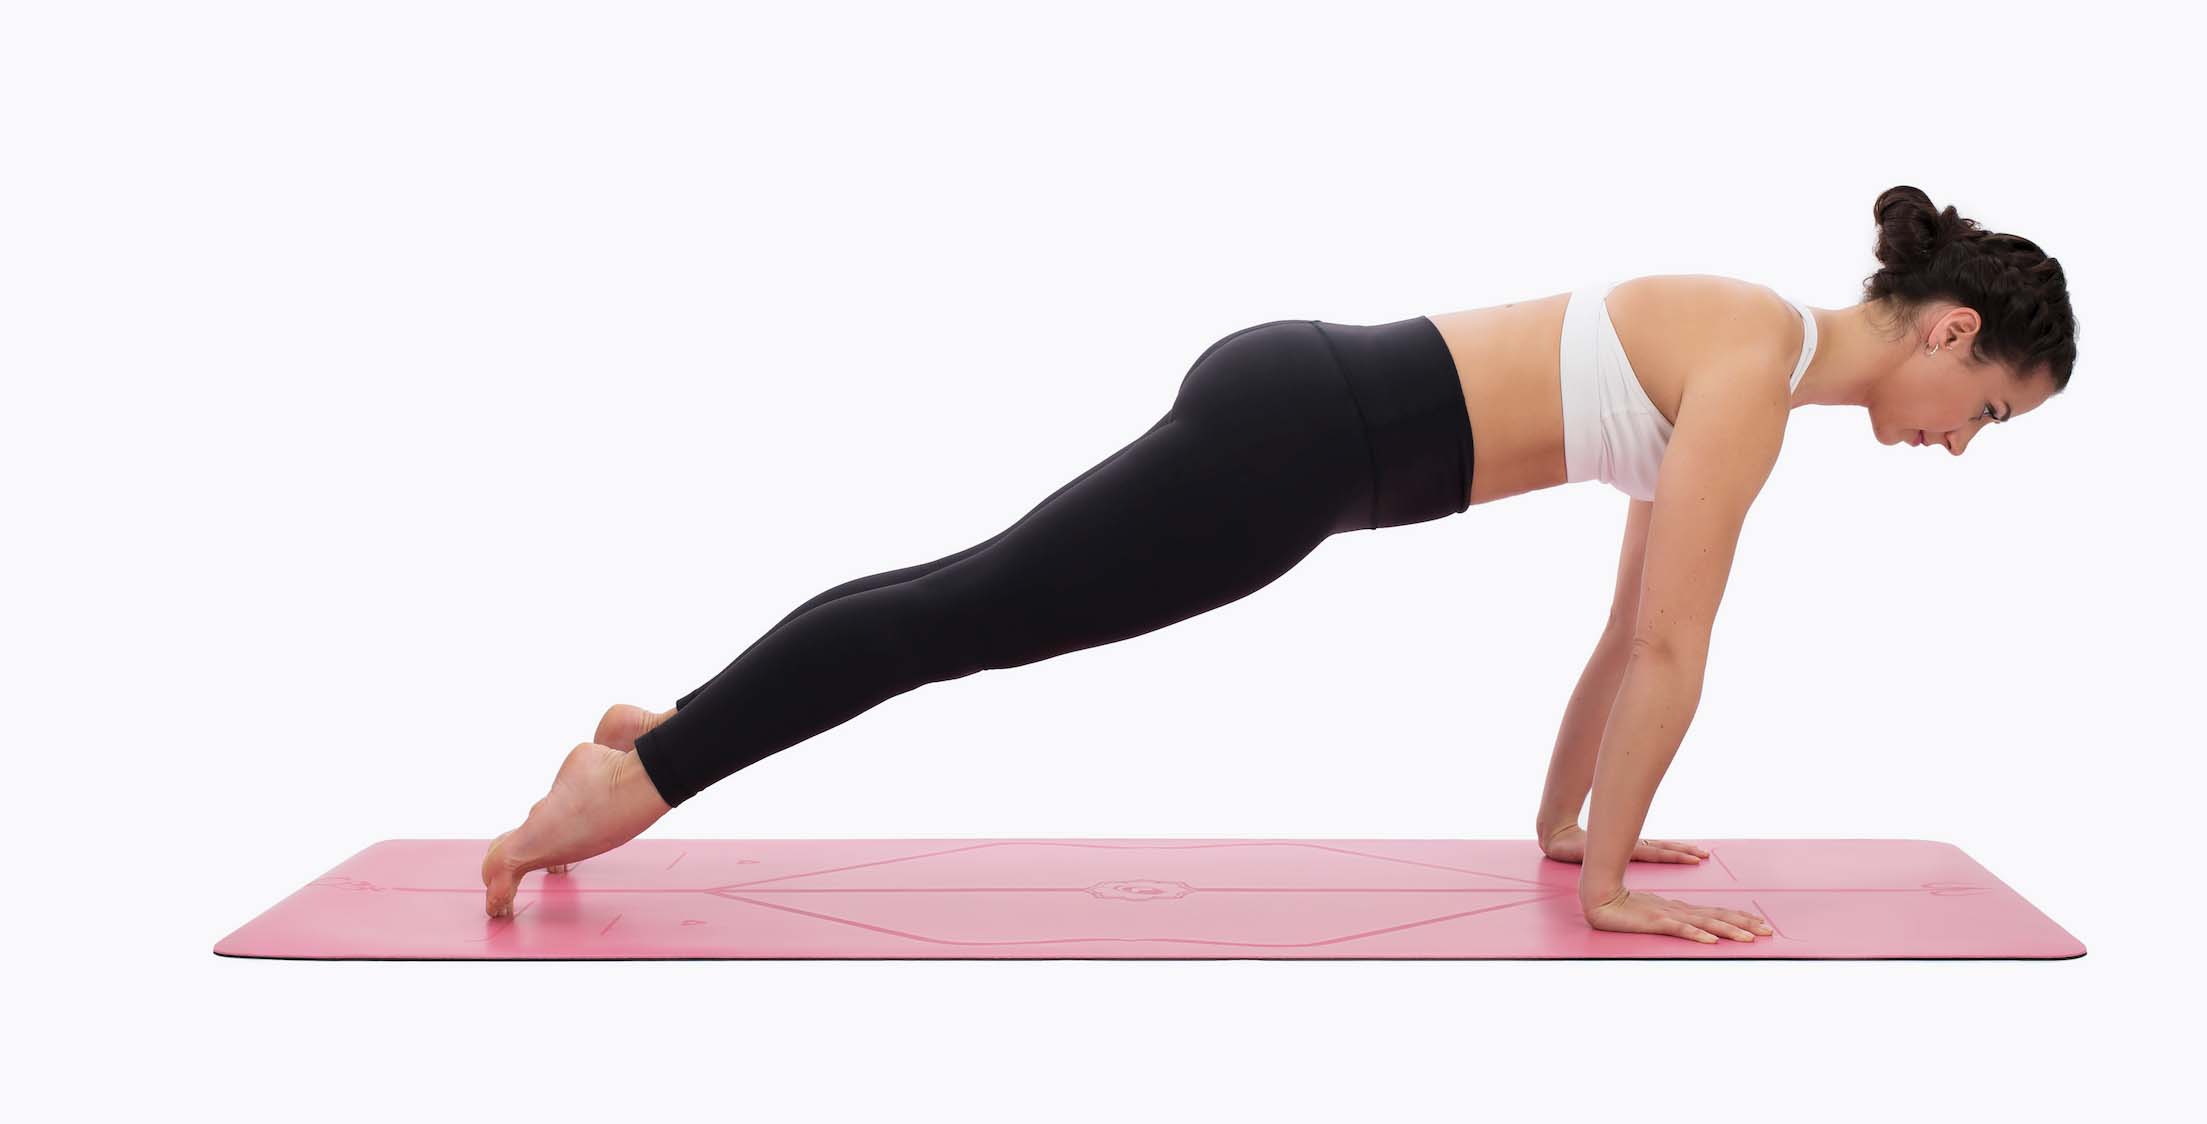
- Shift your weight forward onto your toes. Your shoulders will move in front of your wrists as you do this.
- Soften your elbows slightly to open your chest, pull your shoulders back, and anchor your shoulder blades to your back body.
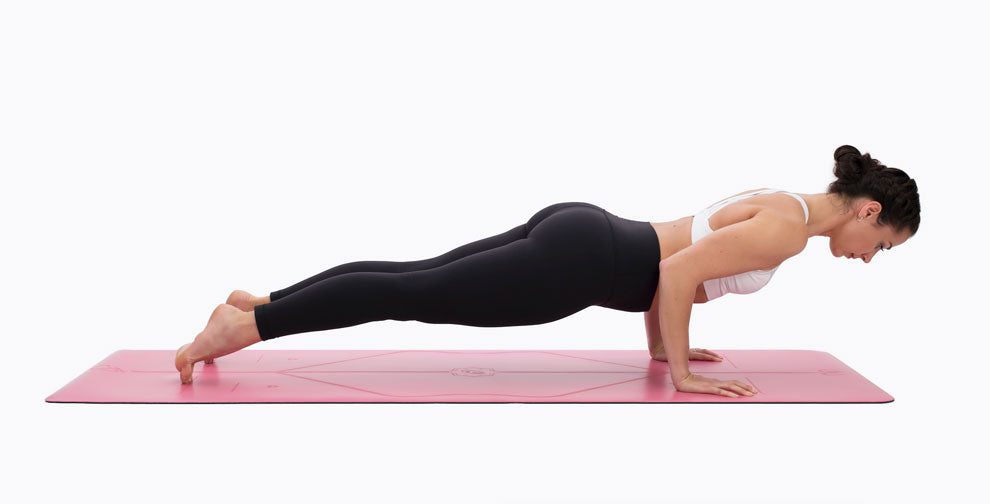
- Bend your elbows straight back, hugging them into your sides, to lower your chest toward the floor. Keep your neck neutral and your gaze down.
- Stop lowering when your shoulders are level with your elbows. It’s fine to stop with the shoulders above the elbows but don’t let the shoulders dip below the elbows, which means you’re staying well away from the floor.
- Sometimes the Chaturanga becomes so transitional that you’d be hard-pressed to find a pose in it at all. Pause at the bottom (when your upper arms are parallel to the floor) for a beat to acknowledge the posture and build strength.
- To transition to Upward Facing Dog, straighten your arms and move to the tops of your feet. Rolling over the feet looks cool but it often lands you in a position where the shoulders are in front of the wrists. For a better alignment set-up, flip the feet one at a time.
- Vinyasas are always optional, so skip them if your Chaturangas start to get sloppy.