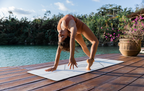
Much as we like to deny it, many of our knees are living on borrowed time. These joints are subject to a lot of wear and tear, especially if you’re into high-impact activities like running. Eventually, knee pain can catch up to you, making it hard to stay active and do the things you love.
Prevention is the key. Strengthen the muscles around your knee now, and you may avoid injury later. If you’re already dealing with knee pain, talk to your health care providers about what kinds of movements you should skip and what kinds can support your recovery.
Can Yoga Strengthen Your Knees?
Yes! Many yoga poses build the small and large muscles that support the knee joints, including the quads, hamstrings, and glutes. Establishing good alignment habits also stabilizes the knees when they are load bearing. Adding dynamic movement to your postures helps build even more strength.
Top Tip: If you have sensitive knees, put an extra blanket or Yoga pad under them in kneeling positions.
Key Alignment Points
- Knee Over Ankle
The knees tend to knock inwards when the muscles around them are weak. To strengthen these muscles, make sure your knee is over your ankle in any posture when the leg is bent (such as Warrior II, see below).
- Use a Block
To reinforce the knee-over-ankle alignment, take a block between your thighs in any standing pose in which the feet are together (such as Chair Pose, see below). Squeezing the block engages your thigh muscles to support the knee joints.
- Feet First
In standing poses, root through the ball and heel of each foot as your draw upward on the arch to activate your whole leg.
- Squat Safely
Doing squats may seem counterintuitive, but they are one of the best ways to build up the muscles that support the knee joints. If you have preexisting knee pain, find out what kind of movement your doctor or physical therapist recommends.
The Best Poses to Strengthen Your Knees

Sanskrit Meaning: Utkata (Powerful)
Yoga Level: Beginner
Pose Type: Standing
Benefits: Strengthens your legs and core
Why this pose: Holding a bent-leg position strengthens the thighs, glutes, and smaller muscles that support your knee joints.
Step-by-Step:
- Come to stand in Mountain Pose at the front of your mat with your feet touching or slightly separated.
- Bend your knees and take your butt back until there is about a 60-degree angle between your shins and the floor.
- Keep your knees directly over your feet. If the feet are together, the knees are also together. If your feet are slightly apart, your knees are the same distance apart.
- Take your arms up next to your ears. Your body resembles the shape of a lightning bolt.
- Hold this position for five to ten breaths. It is also helpful to repeat this pose several times with rest in between.

Garland Pose (Malasana)
Sanskrit Meaning: Mala (Garland)
Yoga Level: Beginner
Pose Type: Standing
Benefits: Stretches and strengthens the feet, ankles, knees, and hips.
Why this pose: A deep squat stretches the legs from your instep to glutes, which supports joint health.
Step-by-Step:
- Come to stand at the front of your mat with your feet separated about 12 inches (this may vary depending on your size).
- Turn your toes out around 45 degrees.
- Bend your knees, lowering your butt close to the floor.
- Take your feet wider apart if that’s necessary to keep your heels on the floor. If the heels don’t come to the floor, take a rolled-up blanket under them so they have something to ground into.
- If squatting is very uncomfortable, take a block or two under your butt for support.
- Take your elbows inside your knees and bring your palms together at your heart. Use this resistance to draw your shoulders down and straighten your spine.
- For a dynamic version of Malasana, place your palms flat on the floor in front of you. Straighten and rebend your legs repeatedly.

Warrior II (Virabhadrasana II)
Sanskrit Meaning: Virabhadra (a Hindu warrior)
Yoga Level: Beginner
Pose Type: Standing
Benefits: Strengthens the legs, back, arms, and core. Opens the hips, hamstrings, and chest.
Why this pose: The front knee likes to drift inwards. Keeping it over the ankle is good practice.
Step-by-Step:
- Come to stand at the front of your mat.
- Step your left foot to the back of your mat, turning your pelvis to face the left side of your mat.
- Bend your right knee so that your knee comes over your ankle with the shin perpendicular to the floor.
- Adjust your back foot, turning your toes out so that your left arch is aligned with your right heel.
- Bring your arms up to shoulder height, reaching your right arm forward and your left arm back.
- Take your gaze over your front arm.

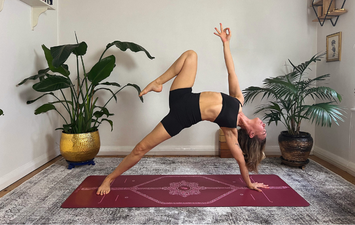
Extended Side Angle (Utthita Parsvakonasana)
Sanskrit Meaning: Utthita (Extended) Parsva (Side) Kona (Angle)
Yoga Level: Beginner
Pose Type: Standing
Benefits: Strengthens the legs and core. Opens the chest, shoulders, and side body.
Why this pose: The additional support offered by having your hand on the ground allows you to deepen your front knee closer to a 90-degree angle.
Step-by-Step:
- From Warrior II, lean your upper body forward and bring your right hand to the floor inside your right foot. If that’s not comfortable, take a block under your right hand or bring your right forearm to your right thigh instead.
- Use the traction from the right arm and right leg pressing into each other to open your chest and lift your left arm to the ceiling.
- Deepen the bend in your right leg to bring your right thigh parallel to the floor while keeping your right knee tacked over your ankle.

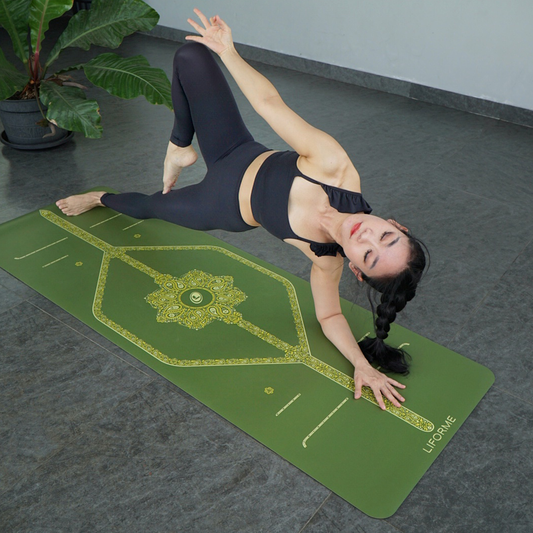
Half Moon Pose (Ardha Chandrasana)
Sanskrit Meaning: Ardha (Half) Chandra (Moon)
Yoga Level: Intermediate
Pose Type: Standing Balance
Benefits: Strengthens the legs and core. Opens the hips and chest.
Why this pose: Balancing on one leg teaches you muscle engagement and builds strength.
- From Warrior II, shift your weight forward into your right leg as you take your right hand to the floor in front of your right foot.
- Straighten your right leg and lift your left foot away from the floor.
- Stack your left hip over your right hip and your left shoulder over your right shoulder.
- Keep a slight bend in your right knee. Flex your left foot strongly to activate that leg.
- Take your gaze up to your left fingertips.

High Lunge Pose
Yoga Level: Intermediate
Pose Type: Standing
Benefits: Works the core, legs, and feet. Improves balance.
Why this pose: Adding a balance challenge forces your muscles to work harder.
Step-by-Step:
- Come to stand at the front of your mat.
- Step your left foot to the back of your mat. Stay up on the ball of the left foot.
- Bend your right knee so that your right thigh is parallel to the floor and your right knee is directly over your ankle. Keep your left leg straight.
- Take your hands to your hips to make sure that your pelvis is facing the front of your mat, then take your arms overhead.
- To add dynamic movement, straighten and bend your right knee several times.

Goddess Pose (Utkata Konasana)
Sanskrit Meaning: Utkata (Powerful) Kona (Angle)
Yoga Level: Beginner/Intermediate
Type of Pose: Standing
Benefits: Opens the hips and groins, strengthens the feet, thighs, and back
Why this pose: You’ve worked on controlling your knee drift one leg at a time. Now try to do it on both legs at the same time.
Step-by-Step:
- Come to a wide-legged-standing position facing the long side of your yoga mat.
- Turn your heels in about 45 degrees.
- Bend your knees to bring your thighs toward parallel with the floor.
- Keep opening your knees to keep them over your ankles.
- Bring your hands to Anjali Mudra at your heart.
- If you like, lift your heels off the floor to come onto the balls of your feet.

Bridge Pose (Setu Bandhasana)
Sanskrit Meaning: Setu (Bridge) Bandha (Lock)
Yoga Level: Beginner
Type of Pose: Supine Backbend
Benefits: Strengthens the hamstrings, glutes, and quads. Opens the chest and shoulders.
Cautions: Neck injury
Why this pose: Bridge strengthens the legs. Try the pose with a block between the knees if your knees tend to drift inwards or outwards.
Step-by-Step:
- Come to lie on your back with your knees bent and the soles of your feet on your mat.
- If you can reach down with your fingertips and graze the backs of your heels it means your knees are over your ankles.
- Press your feet into the floor and lift your hips.
- Roll your shoulders under to puff up your chest. Clasp your hands behind your back or keep your arms by your sides.
- Keep your head still and your gaze on the ceiling.
- Hold for several breaths, then release your arms and lower your butt to the floor.
- Repeat the posture two more times.

Reverse Tabletop (Ardha Purvottanasana)
Sanskrit Meaning: Ardha (Half) Purva (East) Uttana (Intense Stretch). In this case, the East refers to the front side of the body.
Yoga Level: Beginner
Type of Pose: Arm Support
Benefits: Strengthens the arms, legs, glutes, and back. Opens the chest and shoulders.
Why this pose: It takes power in the glutes and thighs to lift and hold this position.
Step-by-Step:
- Come to sit on your mat with your knees bent and feet flat on the floor.
- Take your palms to the mat on either side of your hips.
- Press into your hands and feet to lift your hips to the level of your knees.
- Take your head back, holding your neck parallel to the floor.
- Squeezing a block between your thighs helps keep your legs active.

Child’s Pose (Balasana)
Sanskrit Meaning: Bala (Child)
Yoga Level: Beginner
Type of Pose: Prone
Benefits: Stretches the thighs, shins, hips, shoulders, and back
Why this pose: Stretching is just as important as strengthening.
Step-by-Step:
- From a hands and knees position, widen your knees to the sides of your mat and bring your toes to touch.
- Sink your butt back to rest on your heels.
- Stretch your arms towards the front of your mat.
- Bring your forehead to the floor.
Knee Deep
While it’s particularly helpful to practice these ten poses to strengthen your knees, any yoga you do regularly will benefit your joint health by improving your flexibility, alignment, and body awareness. Every part of the body is connected, so every bit of work you do from your toes to your crown contributes to a healthier, more resilient body that will carry you through the world.